The Lost Waterfalls in Panama are one of the country’s premier attractions. Located a short distance out of adventure capital Boquete, this set of three waterfalls, sometimes referred to as Las Tres Cascadas, offers an adventurous trek suitable for anyone of a good fitness level.
Much of the information online is out of date and travelling there from Boquete can be a little confusing. Therefore, it is really important to do your research before you visit to ensure that you arrive in the right place and avoid getting ripped off!
This guide to visiting Panama’s Lost Waterfalls will tell you everything you need to know, from what to pack for the trail, how to get there and where to find the iconic cascades!
Related: (opens in new tab)
The Lost Waterfalls, Panama – A Guide
This post contains affiliate links. If you use them, I will receive a small commission at no extra cost to you.
The Lost Waterfalls Trail Map
The Lost Waterfalls Hike
- Distance: 6.8km (round trip)
- Duration: 3 hours (round trip)
- Difficulty: Moderate
Dreaming of cloud forest hikes that make you feel like Indiana Jones? You’re in the right place! This out-and-back trail is suitable for anyone of a decent fitness level and will take around three hours to complete. The trail is incredibly well-signed and although it is muddy, it’s generally pretty grippy in most places.
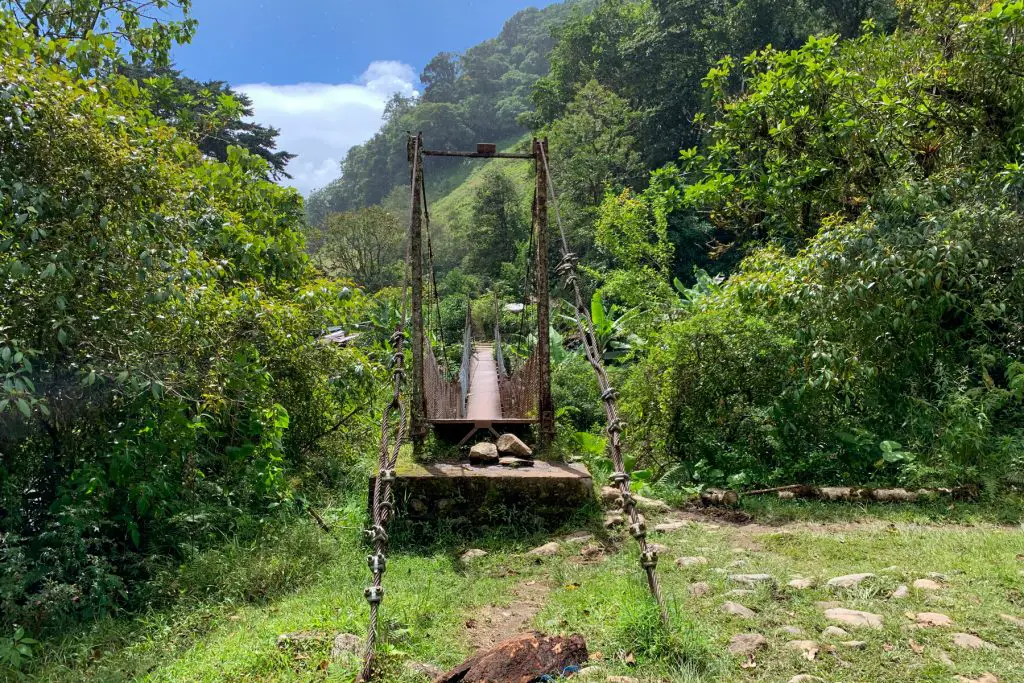
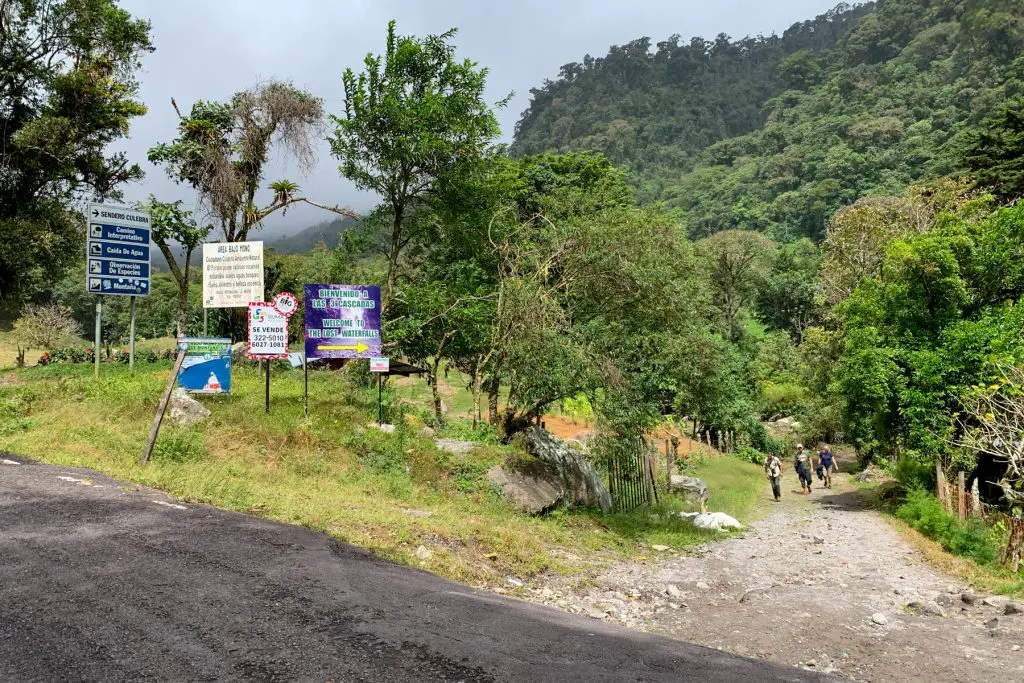
Once you’ve arrived at the Las Tres Cascadas trailhead (which is signed) follow the trail towards the suspension bridge. Beware, if you don’t like unstable bridges, this crossing can be more than a little bit daunting! I found the easiest way to complete it was to do it very quickly, despite the rocking!
After you’ve crossed the bridge, you’ll need to head up the hill. This is quite steep but easily doable. There is a handrail in case it has been raining and the terrain is slippy. Continue along the beaten track until you come to a small wooden hut on your lefthand side. This is where you pay your $10USD entrance fee to access the falls.
At the entrance booth, you’ll be advised to visit the waterfalls in the following order: waterfall #2, waterfall #3 and then finally, waterfall #1 on your return journey. The reason for this is that waterfall number one is the tallest and arguably, the most impressive. You’ll also be asked to sign in so the landowners can track the number of people visiting the falls and make sure that everyone returns.
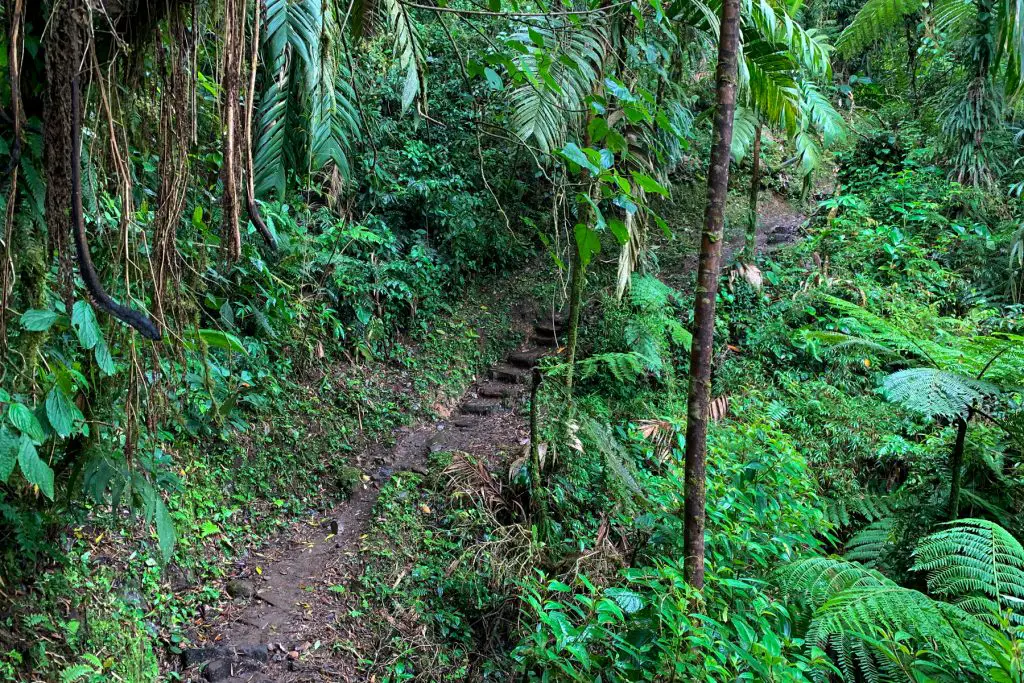
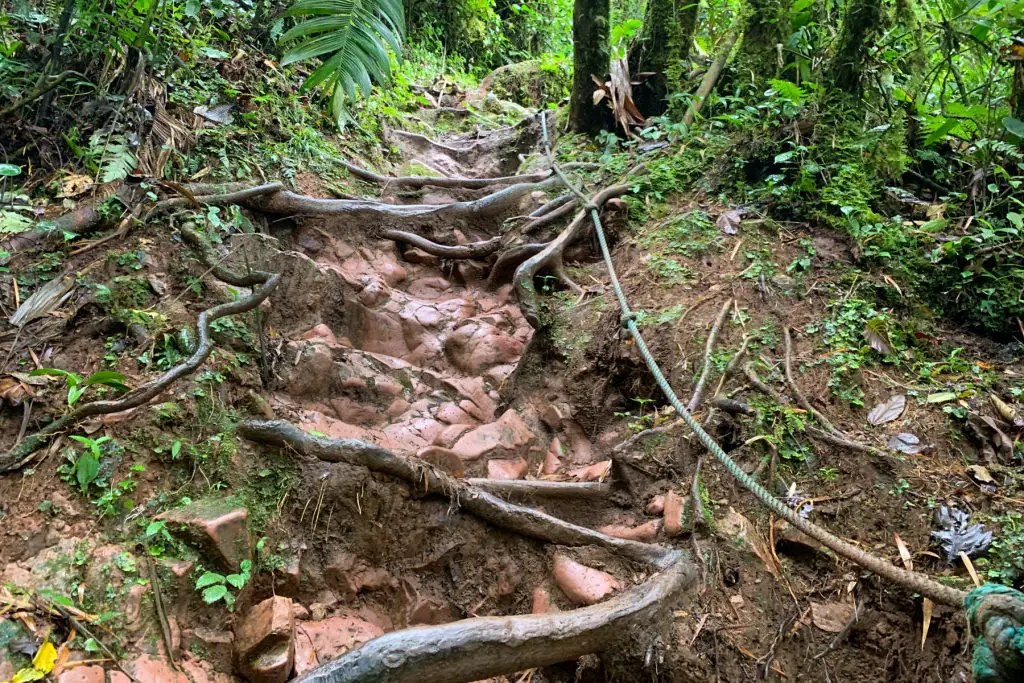
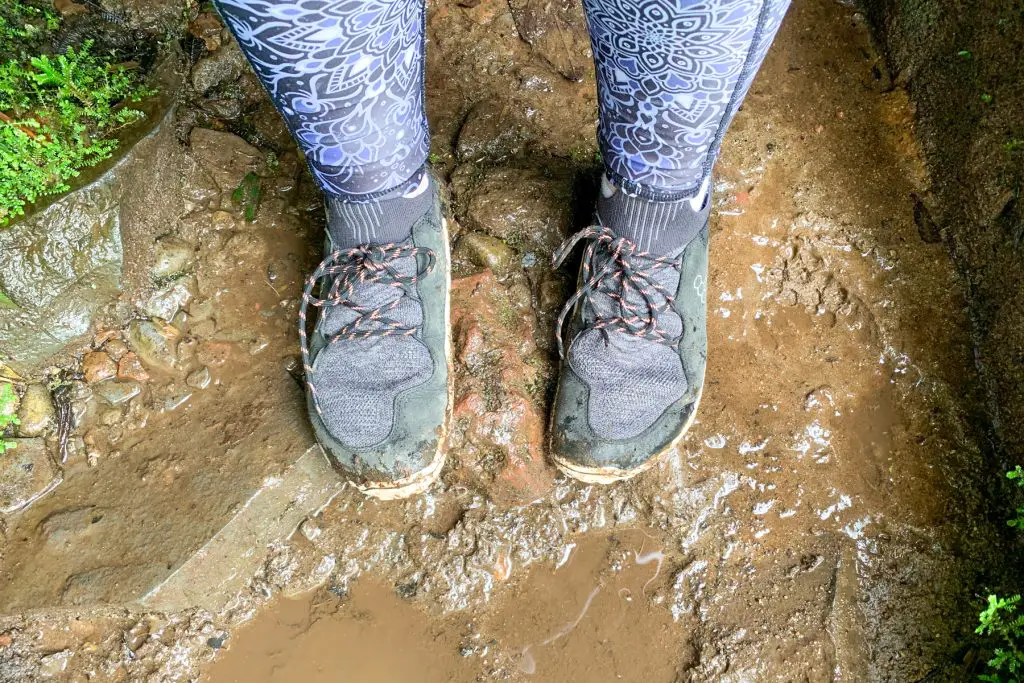
The muddy trail up the Lost Waterfalls is made up of rocks which can be very slippery. Wooden tree stumps which act as paving stones have also been installed to provide additional grip. That is what your entrance fee is funding! As the trail can get very muddy, it is advisable to wear proper hiking shoes or boots. You won’t get very far if you attempt to do this trail in flip-flops during the rainy season!
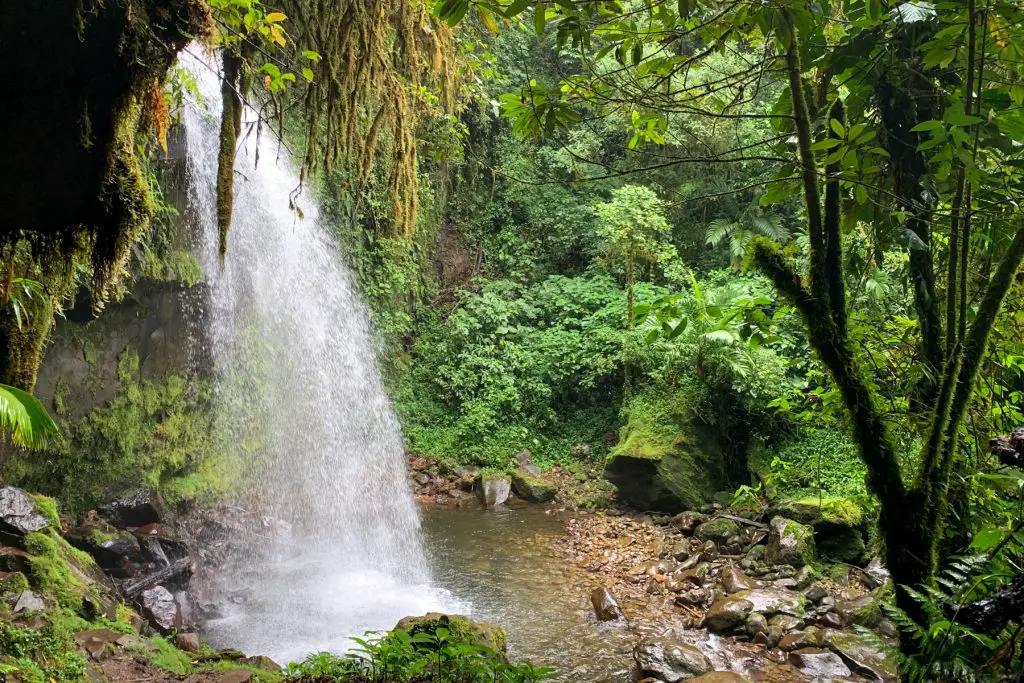
The second waterfall is easy enough to get to if you don’t mind a bit of uphill scrabbling. There is also a small cave alongside the falls but be warned, if you want to explore it, you will be getting wet! Consider bringing swimwear if you fancy a dip in the pools along the route. Not knowing what to expect from this trail, I was pleasantly surprised when I saw the beautiful waterfall – it was much more impressive than I had expected!

It is always good to have an offline copy of your trail map. After all, phone signal comes and goes, especially in more remote areas! To make sure that I don’t get caught out, I use AllTrails Pro. It allows me to download trail maps direct to my phone and also tracks my journey, compiling my stats at the end. I also love sharing my adventures with the AllTrails community! Try a 7-day free trial of AllTrails Pro here.
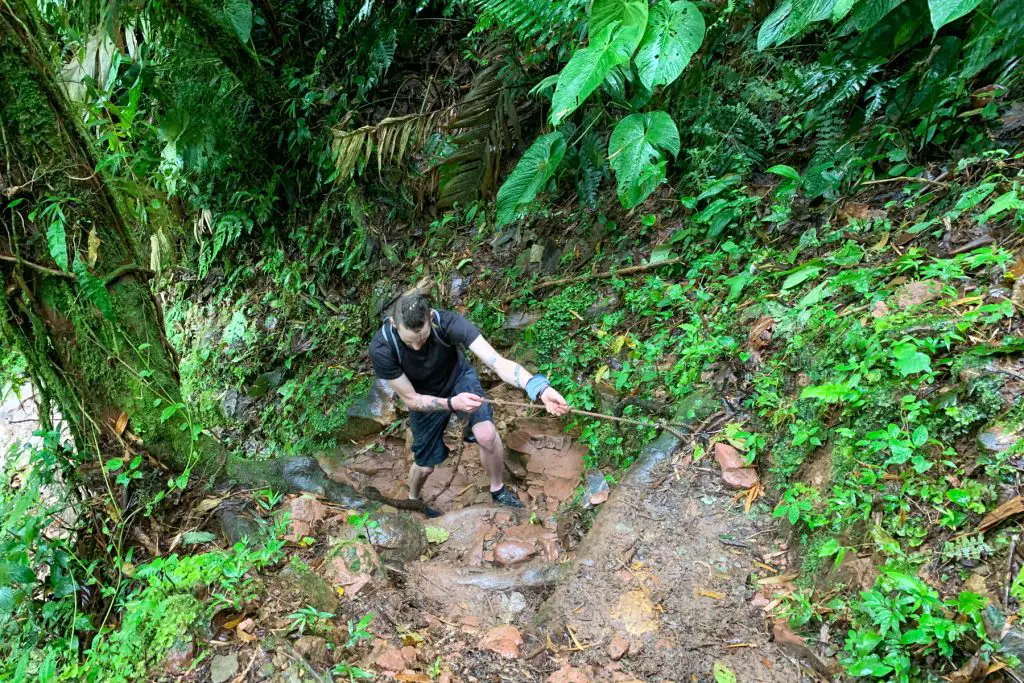
The third waterfall provides an additional challenge. Ropes have been installed to help visitors climb the steepest and most slippery parts of the trail on the way up. As expected in dense jungle, the ropes get pretty muddy but are definitely needed! You can always wash your hands in the pools afterwards if they get dirty.
You will hear the third waterfall long before you see it. This was my favourite of the falls as you can get really close to the crashing cascade. There is a bench located a little way up from this stunning waterfall where you can stop, rest and take in the views. Once you’ve soaked up the magic, head back along the same trail.
This next part of the Lost Waterfall trail is arguably the most difficult. When you see the sign for the first waterfall, you will need to follow it down. This trail is very steep and you may find that you need to use the ropes to get down safely.
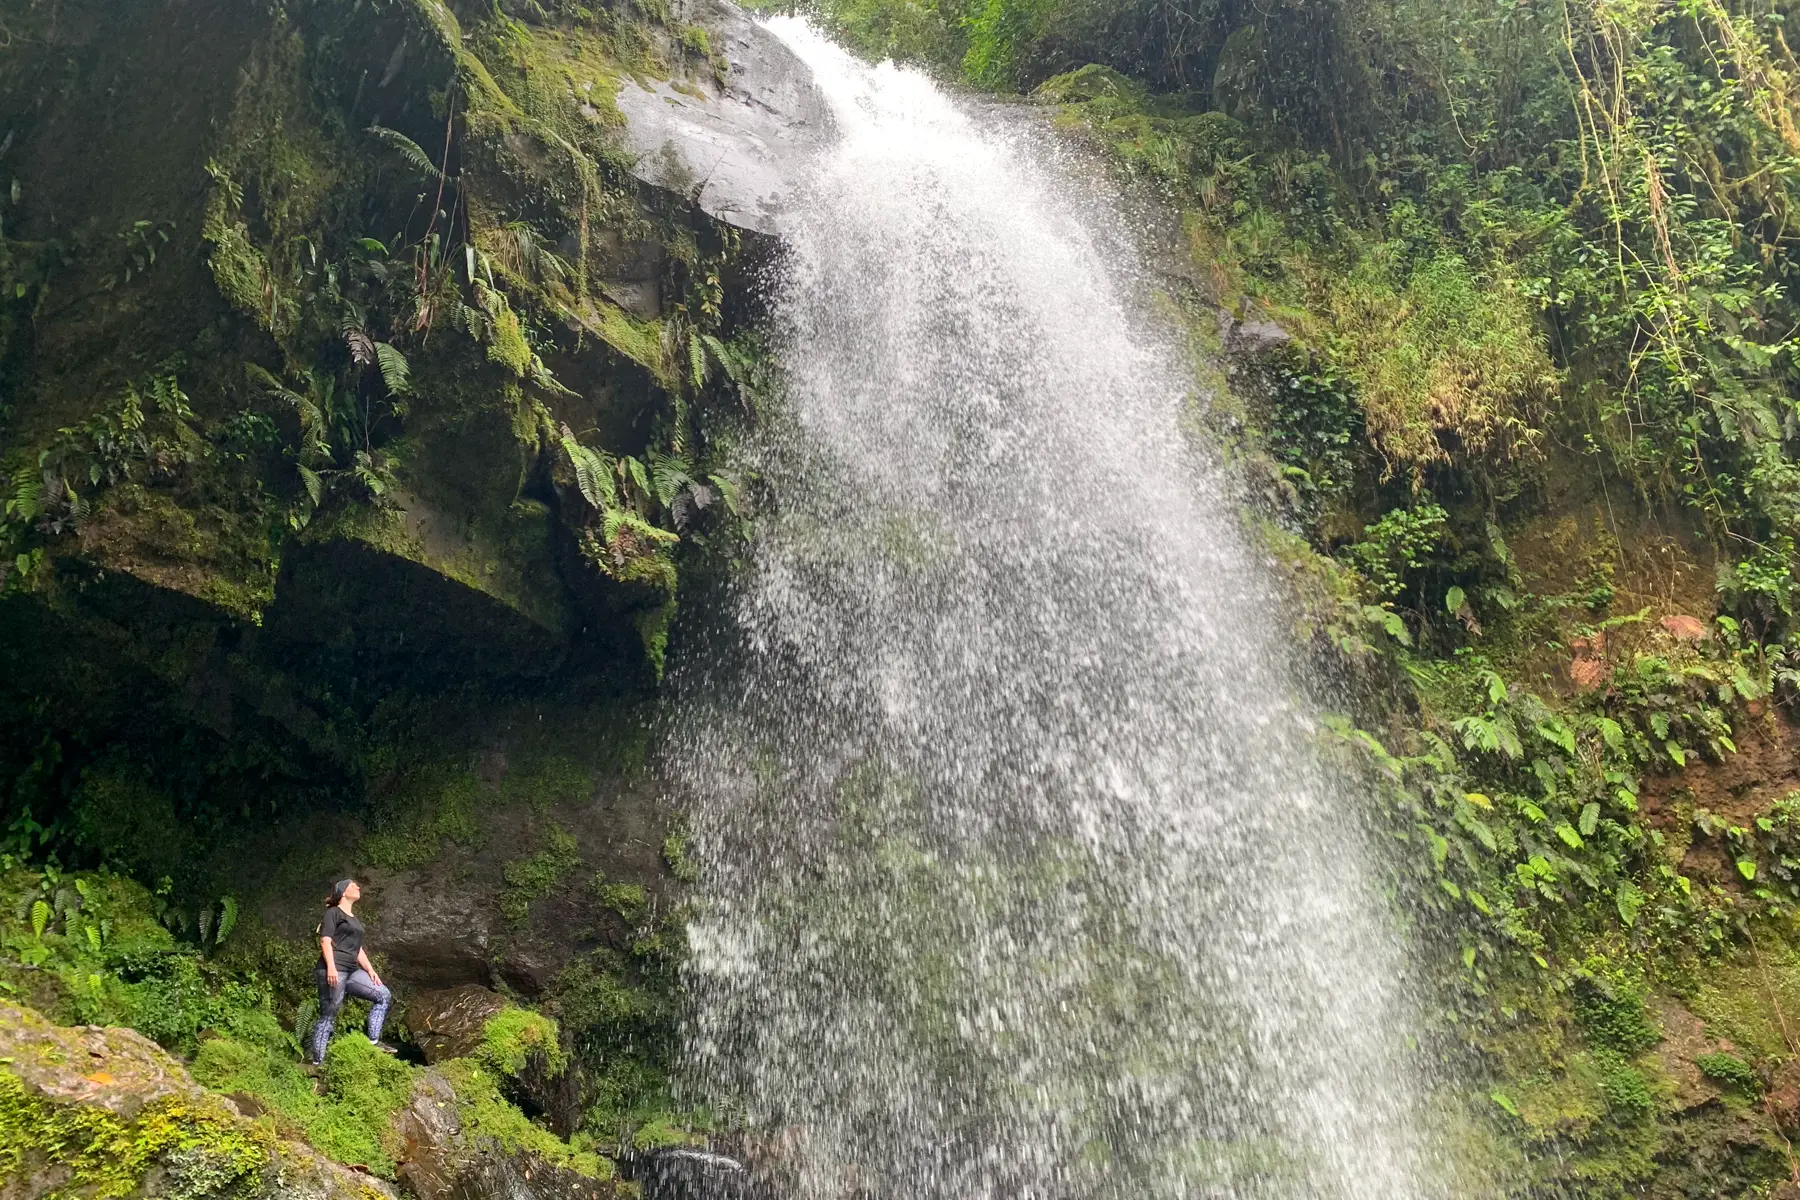
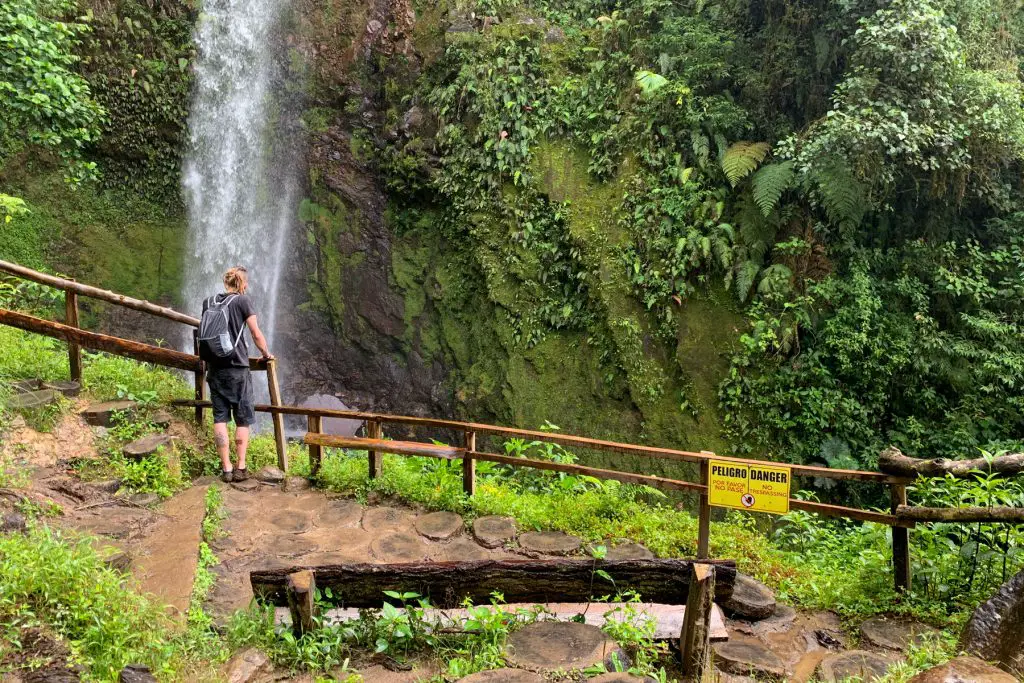
Once you arrive at the bottom, prepare for the view to take your breath away. Easily the tallest of all three waterfalls, waterfall number one is nothing short of epic. There is a nice viewing platform at the bottom, complete with a bench where you can sit and enjoy the views. I had read posts that said there is a steep drop and no fencing around this area but this has since been installed, making it a lot safer.
After you’ve finished at the first of the falls, you will need to complete the remainder of the return hike. Keep an eye as you never know what Panamanian wildlife you could see on your way back. During my hike, I saw both a massive centipede and even one of the elusive resplendent quetzals!
In my opinion, the Lost Waterfall hike was one of my favourites in the whole of Panama. The trail was moderately challenging but really fun and even though it was muddy, this only added to the adventure. While any waterfall would have been nice to see, the fact that all three of the falls were so impressive, made this a fantastic hike for any visitor’s bucket list.
How to Get to The Lost Waterfalls
Once you have travelled to Boquete, there are three ways to get to the Lost Waterfalls. I have listed them from the cheapest option to the most expensive below.
- Colectivo
These shared minibuses head north out of town at regular intervals throughout the day. Flag down a colectivo for El Bajo and ask for Las Tres Cascadas. They will then drop you in the right place. It costs around $3USD per person per journey. If you want to get colectivo back to Boquete, head back towards the pink hut at the intersection and flag one down from there.
- Taxi
Flag down a taxi in Boquete town and ask to be taken to Las Tres Cascadas. The cheapest that you should expect to pay per person is around $3USD however, taxis can charge up to $6USD per person one way. They will likely drop you at the sign that says Area Bajo Mono. A Lost Waterfalls sign has also been installed here. To get a taxi back, walk back along the road until you reach the pink hut at the intersection. You are more likely to see a taxi along this road.
- Tour
Many of the hostels in Boquete town will run tours to visit the Three Waterfalls. These usually cost in the region of around $30-$40USD and will pick you up from your accommodation. The tours usually pick up in the morning and take around four hours to complete.
Also read: Getting from Panama City to Boquete.
How Much Does it Cost to Visit The Lost Waterfalls?
Much of the current information on the internet regarding the entrance fee into the Lost Waterfalls is out of date. The current entry fee is $10USD per person. Although I did hear a couple of people complaining about the price, in my opinion, this is a very reasonable price to pay for such a well-maintained jungle trail.

Payment must be made in cash. There is a booth around 10 minutes into the hike where you can pay the entrance fee. Make sure you sign your name in the ledger so that the staff can check that you return from your hike. You should also keep your receipt of payment (factura in Spanish).
What Should I Pack for The Lost Waterfalls Trail
As Las Tres Cascadas is hidden in the cloud forest, you should prepare for a damp environment. Even on a relatively clear day, mist hangs in the forest, meaning you’re likely to get wet as you hike. A packable waterproof jacket is an essential item.
Unlike some of the other hikes in Panama, you will not be asked to leave your passport number in the register so you don’t strictly need your passport. (However, Panamanian law does say that tourists should carry photo ID at all times.) If you do want to take it, make sure it is in a ziplock bag or other waterproof case to prevent it from getting damaged in a downpour.
I wouldn’t recommend taking an expensive camera because the cloud forest environment is so moist. After getting water in my camera at the Galapagos, I learnt the hard way that electronics and water don’t mix! Your phone will likely suffice if you want to snap photographs of the trail.
Even though Boquete is a cooler destination than many others in Panama, hiking to the Lost Waterfalls will make you sweat! It is important to stay hydrated on the trail, so make sure you pack lots of water for the hike.
Grippy walking shoes or boots are a must in this wet and humid environment.
Swimwear is recommended if you think you might like to cool off in some of the pools en route. Although it was a bit chilly to do this on the day I visited, I am sure it would be a welcome relief on a hot day! If you’re planning to swim, don’t forget to bring a towel and a change of clothes.
Places to Stay in Boquete Town, Panama
There is abundant accommodation in Boquete to suit every kind of traveller. The following are a few of the best.
Bambuda Castle ($)
If you’re reading this and wondering whether I could’ve possibly got the price range right, let me assure you, it is correct! This old-school castle has been turned into a hostel and offers a truly unforgettable stay. Although private rooms are considerably more expensive, dorm beds offer great value for money.
Selina ($$)
This flashpacker offering situated on the main road offers accommodation and a community to go along with it. Book one of their micro cylinders for a truly novel stay and don’t forget to make the most of the in-house activities such as yoga, bingo and art classes.
The Inn at Palo Alto ($$$)
For a touch of luxury, haul up at The Inn at Palo Alto. Located on the river, this idyllic spot boasts clean and comfortable rooms, complete with terrace overlooking the lush greenery outside. A delicious breakfast is included in the room rate.
Have you hiked the Lost Waterfall trail yet? Let me know your experience in the comments!
